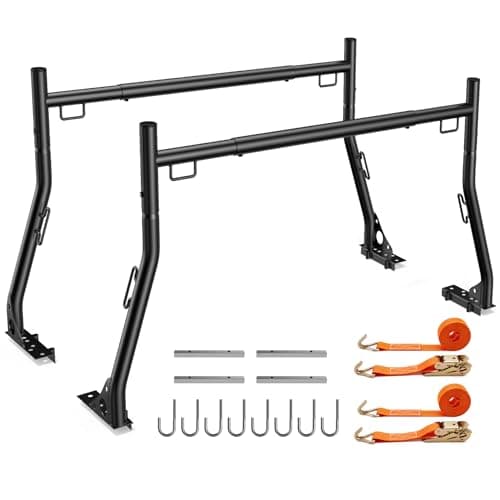
Featured here: the JY PERFORMANCE DAC875 Ladder Rack, 800 lb, No-Drill J-Bolt Mount.
Heads up: we earn an Amazon commission when you buy through our links, at no extra cost to you. Prices are pulled live from Amazon and were last checked November 12, 2026; when we cannot verify a price we say so rather than print an old one. How this site is funded.
How we know:Spec-verifiedOwner-report-verifiedWhat these mean
Top pick9.5/10★★★★★
JY PERFORMANCE
JY PERFORMANCE DAC875 Ladder Rack, 800 lb, No-Drill J-Bolt Mount
A two-bar steel rack that holds the bed rails with four J-bolt clamps and nothing else: no holes to drill, no holes to seal, and it comes back off when the truck is sold.
Installing a ladder rack takes about two hours with a second pair of hands, and the work is almost entirely measurement. You set the rack width to your bed, you position the feet over solid rail structure, you clamp or bolt them, you square the uprights, and you torque everything in a cross pattern. The part that goes wrong is never the bolting — it is a rack that was fitted slightly out of square and then loaded, after which it stays out of square for the rest of its life.
Before anything else: decide whether you are drilling. A no-drill rack clamps to the bed rails with J-bolts or rail clamps and leaves the truck as it was, which is the right choice on anything you intend to sell. A drilled install is stronger and permanent. Both options are legitimate and the decision is not reversible in one direction.
If you are not sure, do not drill. A modern J-bolt or clamp mount holds a ladder rack properly when it is torqued correctly and checked twice in the first month — and it does not put four unpainted holes in your bed rails, which is both a resale question and a rust question.
What you need before you start
A tape measure and somebody to hold the other end.
A torque wrench. Rack hardware has a torque spec and clamps that are merely tight work loose. This is the one tool people skip and should not.
A combination square or a level. For checking the uprights are vertical and the bars are parallel.
Touch-up paint, if you are drilling. Every drilled edge gets painted before a bolt goes through it.
Two hours and a flat surface. Doing this on a slope makes the squaring step much harder than it needs to be.
The install, in order
Measure your exterior bed rail width, outside to outside across the rail tops nearest the cab. UWS publishes roughly 65 in on an F-150, 64 in on a Silverado 1500, 66 in on a Ram 1500 and 57 in on a Tacoma. Write it down.
Set the rack to that width on the ground, before it goes anywhere near the truck. Adjustable racks are far easier to set at waist height than over a bed.
Find the solid structure under each rail. Rails are not uniformly solid along their length; the clamp wants to sit where there is doubled metal or a stake pocket, not over a hollow section.
Position the front upright close to the bulkhead and the rear one forward of the tailgate hinge, so the gate still opens fully. Check the gate before you tighten anything.
Hand-tighten all four feet, then step back ten feet and look at the truck from behind. The uprights should be vertical and the bars parallel to the rails.
Square it properly. Measure diagonally, corner to corner, both ways. The two diagonals should match. If they do not, the rack is a parallelogram and it will stay one.
Torque in a cross pattern to the figure in your instructions, the same way you would wheel nuts. Not round in a circle.
Load it with something light and drive, then re-check every fastener after the first day and again after the first week. Clamped mounts settle.
No-drill against drilled
Both are valid. Only one of them is reversible.
No-drill clamp or J-bolt
Drilled
Strength
Sufficient when torqued correctly
Higher
Reversible
Yes — rails unmarked
No
Rust risk
None added
Every unpainted hole edge is a rust start
Resale
Unaffected
Visible, and buyers notice
Re-checking
Needed after the first day and week
Set and forget
Install time
Shorter
Longer, and needs more care
The VEVOR rack on our ladder rack ranking offers both methods, which is worth knowing if you want to start clamped and decide later. The JY Performance rack is J-bolt only and publishes a 49-73 in width range, which is why it is the recommendation on narrower beds.
Racks that make this install easy
A published width range and no-drill mounting, which together remove most of the difficulty. Live Amazon prices where available.
JY PERFORMANCESpec-verified
JY PERFORMANCE DAC875 Ladder Rack, 800 lb, No-Drill J-Bolt Mount
A two-bar steel rack that holds the bed rails with four J-bolt clamps and nothing else: no holes to drill, no holes to seal, and it comes back off when the truck is sold. It is also one of the few racks at this price that publishes the steel gauge rather than just a rating — 10-gauge, tested to 800 lb.
Build
9.2
Capacity
9.4
Install
9.6
Versatility
9.2
Value
9.7
Why we picked it
+Publishes the steel gauge, not just a rating
+Four J-bolts and the hardware in the box — no holes in the truck
+49-73 in width range, so it moves to the next truck
Good to know. The listing rules out trucks running a tool box, a utility track or a tonneau cover — that is the maker's own exclusion, not our caution. Four J-bolts is also fewer load paths than a clamp-heavy rack, so the rail lip itself has to be sound.
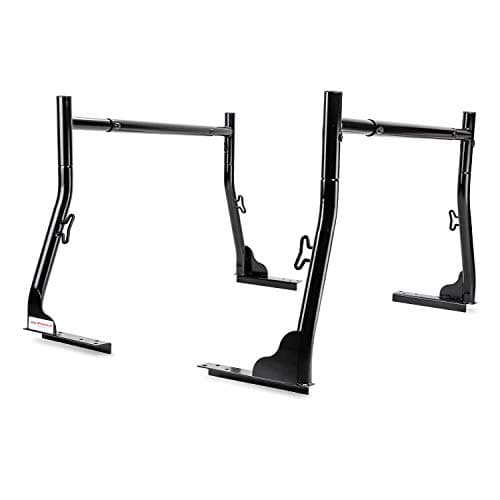
800 lb published capacity, extendable width, two bars, and it costs less than a decent tonneau cover. For a trade truck that carries ladders and conduit, this is the honest value pick in the category.
Build
9.2
Capacity
9.4
Install
9.4
Versatility
9.4
Value
9.7
Why we picked it
+800 lb published, not implied
+Extendable width fits a range of beds
+Cheap enough to buy and still afford the straps
Good to know. Steel means rust at every scratch, and extendable joints mean more fasteners to check. If the rack never comes off, a welded rack would be stiffer.
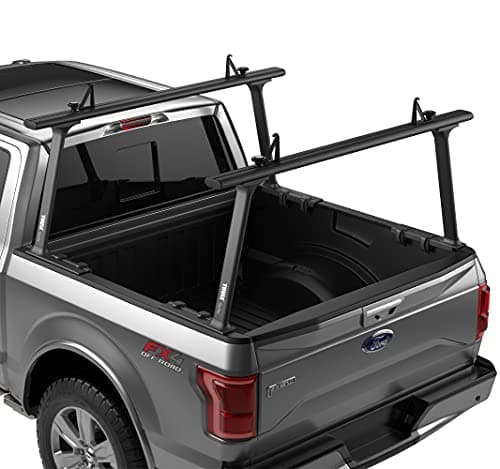
TracRac's entry rack, built on the clamp system the trade standardized on. The reason to pay for it is that the crossbars stay square to each other after a year of loading — budget racks walk out of alignment and then you are fighting the straps.
Build
9.6
Capacity
9.4
Install
9.5
Versatility
9.4
Value
8.9
Why we picked it
+Crossbars stay square under repeated loading
+No-drill clamp system comes off cleanly when the truck is sold
+Thule accessory ecosystem fits it
Good to know. It is a lot of money for a two-bar rack. If the rack carries a ladder twice a month, a clamp-on steel rack does the job for a quarter of the price.
Measure the rail width, set the rack on the ground before lifting it, and measure both diagonals before you touch the torque wrench — that one step prevents most of what goes wrong with these installs.
Questions people actually ask
How do you install a ladder rack on a pickup?
Measure the exterior bed rail width, set the rack to that width on the ground, position the feet over solid rail structure clear of the tailgate hinge, hand-tighten all four, square it by measuring both diagonals, then torque in a cross pattern. Re-torque after a day and after a week.
Do you have to drill to install a ladder rack?
No. J-bolt and clamp mounts hold a ladder rack properly when torqued to spec and re-checked in the first month, and they leave the bed rails unmarked. Drilling is stronger and permanent, which is the right trade only on a truck you are keeping.
How long does it take to fit a ladder rack?
About two hours with two people, most of it measurement and squaring rather than bolting. Doing it alone is possible on a lighter rack and considerably harder, because somebody has to hold the assembly square while the first feet are tightened.
How do I know if my ladder rack is square?
Measure diagonally from the top of one upright to the base of the opposite one, then the other way. The two measurements should match. If they do not, the rack is a parallelogram, and loading it locks that error in permanently.
Why does my ladder rack keep coming loose?
Almost always one of two things: it was tightened by feel rather than to a torque figure, or the clamps sit over a hollow section of rail instead of solid structure. Clamped mounts also settle in the first week and need re-torquing then.
Last reviewed October 17, 2026. Think a figure here is wrong? Tell us at contact@toolboxandtruck.com and we will check it, fix it and date the correction — see our editorial policy.